Tuesday, December 23, 2008

Tuesday, December 9, 2008

Whatsthatbug.com ?

I came across this website just the other day and the following day I walk out onto the patio and came across a cool looking bug I've never seen before... Here's what I sent in to whatsthatbug.com, and they even posted my submission on their website!  :)

"I just came across your website the other day and low and behold I head out to garden this afternoon and see this little guy in my backyard!  I've lived in West Broward (South Florida) all my life and never seen one like this... It was lying on my pool deck and seems to be on his (or hers) last limbs :(  I placed the little guy on a plant after I took these pics. It has two pairs of wings (which is reminiscent of a wasp, but it also has a proboscis, and very, very long antennae and legs. What is this South Florida creature? Is it even from here?
Sunny South Florida
South Florida, West Broward County"


Turns out it's a Milkweed Assassin Bug! OMG! 

Check out whatsthatbug.com description here!

Raised Garden Bed #2


I'm really loving these raised garden beds!  They are perfect for South Florida suburban backyard confinement and can be customized to your hearts content.  Again, I layered newspaper, old leaves, and then soil and plants. Waa-laa...#2!

And planted...

Cucumber
Spring Onion
Sage
Hot Pepper

Getting Bigger! + Basket Pot

Oooo! Check out the growth after only about 1 week!  The cucumber leaves are almost double in size and the tomatoes are really taken off-- I'll have to construct a more suitable trellis. 


Basket Pot Project

I was wandering around my house looking for a project to create and found this old basket.  I got a garbage bag and poked a bunch of holes in it for drainage and then just lined the basket.  I added some broken pottery and rocks for drainage, filled it with soil, and added two sage seedlings and some Mexican Sunflowers.

It's super easy to do!

Recyclable Paper Pots


This was a great find!  They are supposed to be waste baskets, but I turned them into pots with just a few hole pokes down on the bottom and I lined the bottom with some broken pottery bits for drainage.

I found them at Bed, Bath, & Beyond for only $2.00 each! I couldn't resist their cuteness and charm, but especially because they are made from recycled paper products- Yay! 

I transported some Mexican Sunflowers into one and Spring Onion into the other.  Let's see how it'll work out...


Thursday, November 27, 2008

There's Fungus Among Us!


I've read up on this orange fungus that's been all over my plumeria. It seems that it's a rust fungus :( aka Coleosporium domingense, it won't affect the flowers of the plant but will continue to eat away at the leaves and can easily spread to surrounding plants! EEEK!  I just planted my first raised bed garden with cucumbers and tomatoes very close to my plumeria.  I really don't like using chemicals in the garden, but I think I'm going to buy some rust fungus spray to keep it under control.

After closer inspection to the surrounding plants, it looks like the milkweed has got it too! Nooooo!  :( 

I carefully removed any leaves at were contaminated and threw them away in a separate garbage bag.  A lot of the plumeria leaves still have trace signs of the rust.  I'm hesitant to cut off all the leaves, but I know it'll just keep spreading if I don't. Oh, the trials and tribulations of pruning! 

Transporting Mysterious 'Tea Mix'

This 'tea mix', as the packet read contains lemon balm, chamomile, and sage. But it seems only one seedling has really taken off which I cannot identify as any of the 3! Maybe it's a mystery mix? I can't wait to see what grows!


Anywho, it was time to transport them to a bigger home.  I used a terra-cotta bowl and filled the bottom with broken pottery bits (taken from my pottery class's damaged pieces). It's a great material to use for drainage.  

Then I added some manure and garden soil and started carefully spooning out the seedlings into their new homes.  I'd say about 75% of the seeds sprouted, but next time I won't be using these low, shallow containers. I think using a full size plastic pot is much better and less hassle when you are ready to transport.


Building My First Raised Garden Bed


It's nothing fancy, but it does the trick!  I had the guy at the hardware store cut it to size for me and then I just nailed it all together!  The seedlings were just getting too big to continue growing in their current plastic pots. 


Specs:
69 inches long X 13.5 inches wide X 9 inches high

Materials:
Untreated wood (treated has chemicals- not good for growing veggies!), lots of nails, hammer


First, I layered newspaper down on the area (about 6-10 pages thick). This is to kill the grass and prevent any weeds from sneaking in. It also helps retain water!


After that, I set my garden bed on top and watered down the newspaper.  


Next I added some chunky organic material. Luckily, I had a bag full of old bamboo leaves from cleaning up the other week.  I spread them out and watered them down as well.


Then I added some chunky soil that had lots of big pieces of bark, and watered.


I topped it all off with garden soil and the plants! (And watered of course!)

Sunday, November 23, 2008

Ready For Your Closeup?


The larger leaves are called 'seed leaves' and provide extra nutrients during the seedlings development. The next leaves that sprout are called 'true leaves'.


This is a cute baby sage seedling!


Here's some cucumber! Yum!


Can you hear the Bells of Ireland ringing?
Ehh, me either, maybe a few more weeks :)


This Bell of Ireland has really taken off! 

Friday, November 21, 2008

About 3 Weeks Later...


Things have really taken off! I was out of town for about a week and when I came back the seeds were full blow sprouts! Yay!  The weather here had dipped down into the 50s for a few nights so my gardening compadre took them inside and returned them outside in the morning.

In additions since last time include:

  • Parsley (Petroselinum crispum)
  • Cilantro (Coriandrum sativum)
  • Trailing Lantana (Lantana montevidensis)
  • Pineland Lantana (Lantana depressa)
  • Copper Canyon Mexican Marigold (Tagetes lemmonii)
The Lantana's and Mexican Marigold's were planted for their extremely high nectar value. And milkweed acts as a caterpillar host- soooo I hope that I'll soon have a thriving butterfly garden!

Other Garden Additions


In other areas of the scattered patio garden there are:

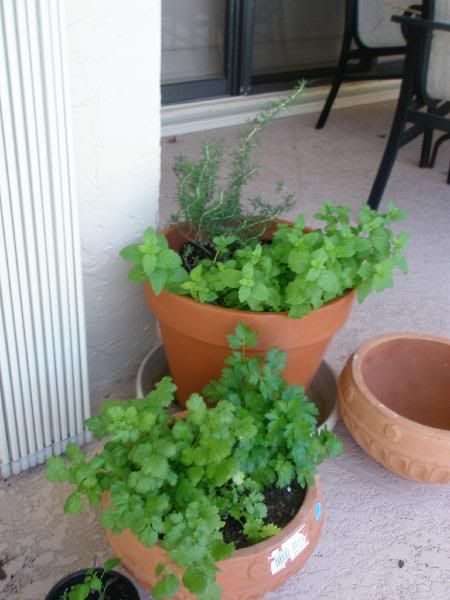
  • Newly planted rosemary and mint
  • Ground orchids (Spathoglottis Plicata)


And you'll see my corner garden doing lovely with:

  • Aloe (12+ years old!) - It started as a house plant in my great-grandmother's house!
  • Buddha Belly Bamboo (Bambusa ventricosa) (3 years old)
  • Plumeria aka Frangipani (2 years old)
  • Milkweed (Asclepias) (1 year old)
  • Princess Flower (Tibouchina urvilleana) (1 year old)
  • And an old wheel barrow full of succulents- aka my 'Cosmic Cactus' (5+ years old)

Thursday, November 20, 2008

In The Beginning


I started off with seed packets of the following:

  • Tomatoes (Super Sweet 100 Hybrid)
  • Cucumbers (Early Pride Hybrid)
  • Spring Onion (Evergreen Bunching)
  • Sage (Salvia officinalis)
  • Mexican Sunflowers (Tithonia rotundiflora)
  • Bells of Ireland (Moluccella laevis)
  • Chamomile 
  • Lemon Balm (Melissa officinalis)
  • Rosemary (Rosmarinus officinalis)

They were planted in old egg cartons (with holes poked in the bottom for drainage), and plastic pots, which were kindly donated to me from a local nursery! 

Two kinds of soil were used; your regular potting soil from Home Depot and then a 'special' blend soil from another local nursery. This soil contains more wood chips and chunky organic matter- my guess is that it's probably palm tree matter.

The seeds were then covered with plastic wrap to better retain moisture.  

Surprisingly within less then one week the seedlings began to sprout!  The plastic wrap was quickly removed because if the sprouts hit the plastic and curved downwards that would be the end of them!